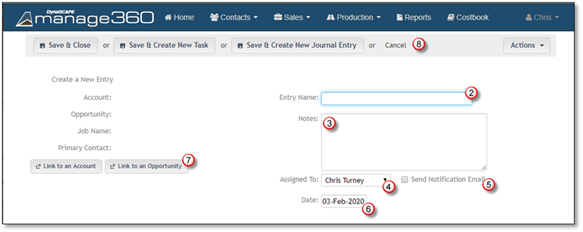
A new entry for the journal can be added from the main Journal page or the Account, Opportunity, or Job Detailed Information > Journal Tab and each process is shown below.
To assist you with adding a journal entry from the main Journal page, we have outlined the steps below:
1. Click on New Entry.

2. Type in a brief Activity Name.
3. Type in detailed Notes which outlines the activity.
4. Click on the Assign To: drop down list if you want to assign the task to another employee.
5. Place a Check mark by Send Notification Email if you would like to send the assigned person a notification email.
6. Choose a Date that the journal entry took place.
7. Click Link to a Customer if the journal entry corresponds to an existing customer.
OR
Click Link to an Opportunity if the journal entry is related to an existing opportunity.
8. Now you have 4 options after you input your tasks and details:
•If you are done creating a new task, click Save & Close
•If you want to create another task, click Save and Create a New Task
•If you want to create a new activity, click Save and Create a New Activity
•If you want to discard the activity, click Cancel.
