To add Kits to your estimate, follow the next steps:
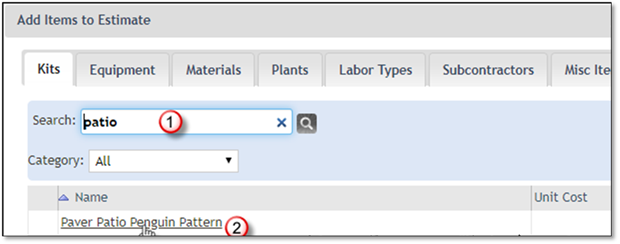
1. Search for the kit you wish to add. Use the search function or navigate using the pagination features.
2. Click on the kit once it is displayed on the kit list.

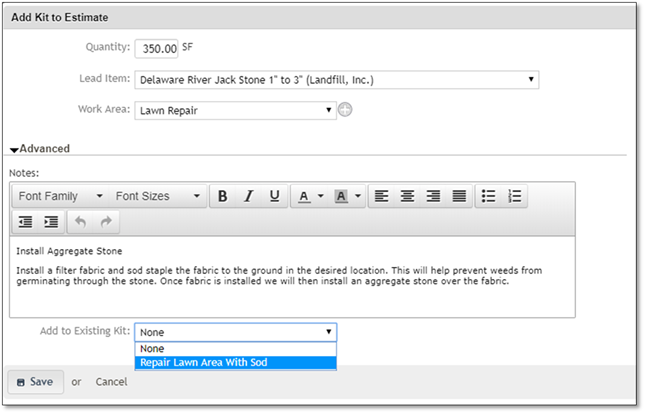
3. Enter a Quantity for the kit and choose the specific lead item needed on this estimate. The default quantity will be 1 and the unit will be in what the Kit was created with.
4. Choose a Lead Item for this kit if lead items are configured. The Lead Items that are available to be chosen for this kit will be in the Lead Item drop down.
5. Select the Work Area where the Kit will be needed or add one or more work areas for this estimate by clicking on the grey + sign, detailed information is available in the Adding Work Areas to an Estimate section.

6. Clicking on the Advanced arrow will allow you to add or edit the Notes for this kit or Add to Existing Kit, if available.

 Note:
Note:
Adding a Kit to an existing Kit will result in the quantity being set to that of the existing Kit. All of the items will be made a part of the existing Kit.
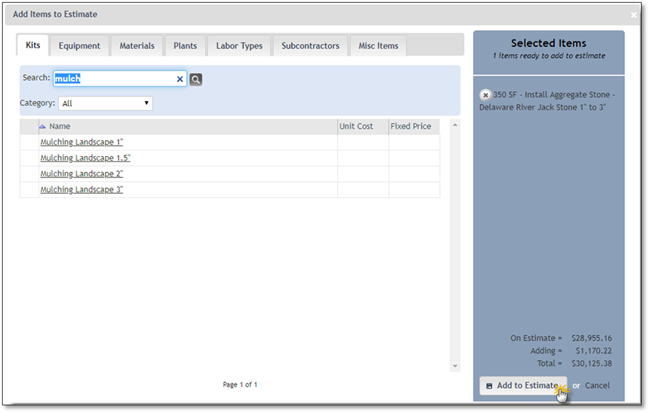
7. Click on the Save button in order to add this kit to the Selected Items list.
 Note:
Note:
Kits are added or created in the Costbook section and are specifically related to the Division your Estimate's Opportunity. If the Opportunity for this estimate is in a Division which has no Kits, the kit area will be empty.
8. Add more kits if necessary or click the Add to Estimate button to add this kit to the Estimate if you are done or Cancel to discard this addition.
