To add Materials to your estimate, follow the next steps:
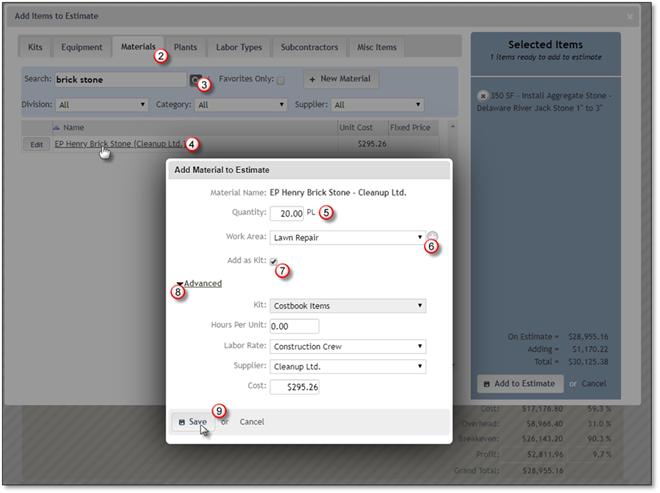
1. Navigate to the Estimate and click on Add Items.
2. Select the Materials tab.
3. Search for the material you wish to add. Use the search function or navigate using the pagination features. If the Material, you need has not been created yet you can create a New Material by Clicking on + New Material Button.
4. Click on the material once it is displayed on the list.

5. Enter the Quantity for the material you have chosen.
6. Select the Work Area where the material will be needed. Or add one or more work areas for this estimate by clicking on the grey + sign, detailed information is available in the Adding Work Areas to an Estimate section.
7. Check off whether you want to add this material as a kit. This will include the plant and the labor in a kit format. It will separate this from the Costbook items when added to the estimate. This option can be on by default and is configured at the settings configurations section.
8. Clicking on the Advanced arrow will allow you to Add to Existing Kit, if available and "Add as Kit" is deselected, you will also have the option to Create a Kit for this item. Adding Hours per Unit is the amount of time it would take to install this material, if you add time then you will need to select the correct Crew type as this will determine the cost for the Hours per Unit. You can also change the Supplier and Cost of the item.
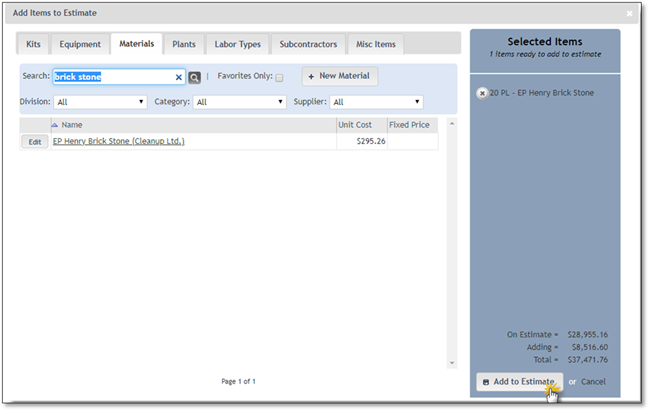
9. Click the Save button in order to add the item to the Selected Items list.
10. Click the Add to Estimate button to add this Material to the Estimate, if you are done or Cancel to discard this addition.
