 Note:
Note:
Some users on Manage 360 will choose to create Work Areas to classify sections of their estimate. There will always be a work area called 'Default' when you initially add items to an Estimate. You may want to break up your estimate by work areas that you define. This can be very useful when generating the Proposal as each Work Area can have its total price displayed. The way you choose to break the estimate is completely up to you and you can name these Work Areas as you add items. The Work Areas can also be edited once they have been added to the estimate.
 Note:
Note:
If you do not use the Default work area in an estimate it will no longer be available for that estimate.
To add a work area:
1. Navigate to the Estimate and click on Add Items.
2. Once there you will choose the first item you want to place in the work area.
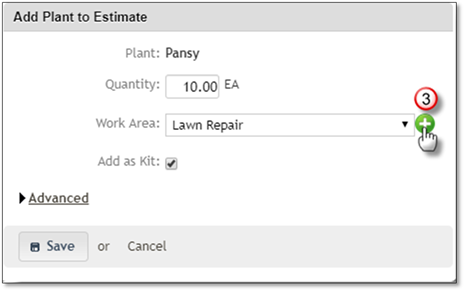
3. The item details window will open Click on the + button that is beside the work area drop down.

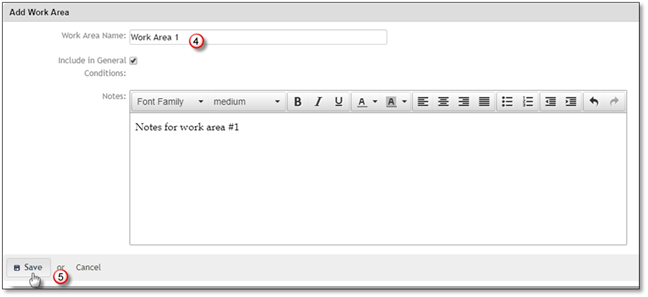
4. Add the Name for the Work Area and add notes if required.

5. Click Save.
The newly created work area will now appear on the items Work Area drop down. You can add more work areas as you need them for the estimate.
 Note:
Note:
Work Areas can only be created when adding items but can be edited after they've been added to the estimate.