If you would like to create another proposal layout, follow these steps:
1. From the estimate screen, click the Action.
2. Click View Proposal the Proposal Layout dropdown will allow you to choose different Proposal Layouts.
3. To add the new, one select Add.
4. Now you can choose to show any of the following:
Proposal Settings
The name of the proposal title can be
changed here:
Proposal
Title: ENTER NEW NAME

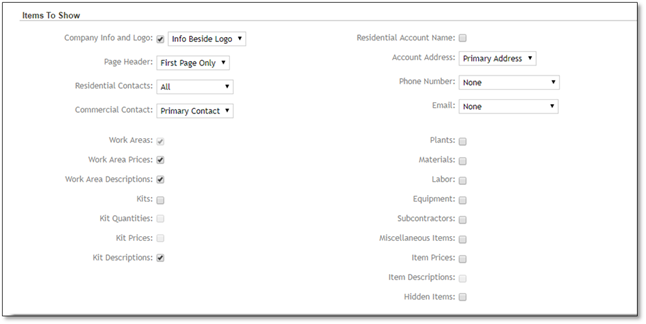
Items to Show
Drop Down menu options for :
•Company Information and Logo options are Info Beside Logo, Info Below Logo, or Logo Only
•Page Header: You have the option of placing it on First page Only or on All Pages
•For Commercial Clients: Primary Contact or Billing Contact
•Location options are: Primary Location or Billing Location.
Check box options to turn on or off the following:

Other
Details
•Agreement Details
•Signature Title
•Client Signature Type enter only 0, 1, or 2.

Proposal Headers
You can choose Delete to remove the header, create new Headers for this proposal by typing in a new one, or you can choose to Save as a Template, so that you can re-use this in any other template, you can also pick from a the Add Header drop down list to use existing headers.
For more information, please see the Settings area, the section entitled: Proposal Headers/Footers.

Proposal Footers
Same as above (Proposal Headers).
5. Save to keep the changes.