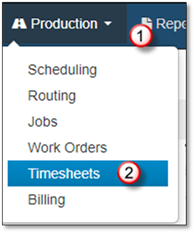
The Approval of Timesheet(s) is completed from the Timesheet Tab. There are two steps involved. Firstly, the timesheets must be set to ready from approval, which is done within each timesheet, then the timesheets can be approved. This can be done for individual timesheets, or multiple timesheets can be approved simultaneously.
1. Go to the Production Area
2. Select Timesheets

3. Any Timesheets you wish to approve must be set to the status Ready For Approval.
a. Set a Timesheet as Ready For Approval, go into the Timesheet and select Save & Set Ready For Approval.
b. If your Timesheet has any validation errors, a warning will appear telling you what needs to be fixed. The options available will then change as shown.
c. To approve an individual Timesheet from within the Timesheet, select Save & Approve.
d. If you wish to un-mark the Timesheet as Ready For Approval, click on the Actions drop-down list and select Revert Status to In Progress.


4. To approve one or more timesheets at once, you may do so from the Timesheets tab. Any Timesheets you wish to approve must be set to Ready For Approval.
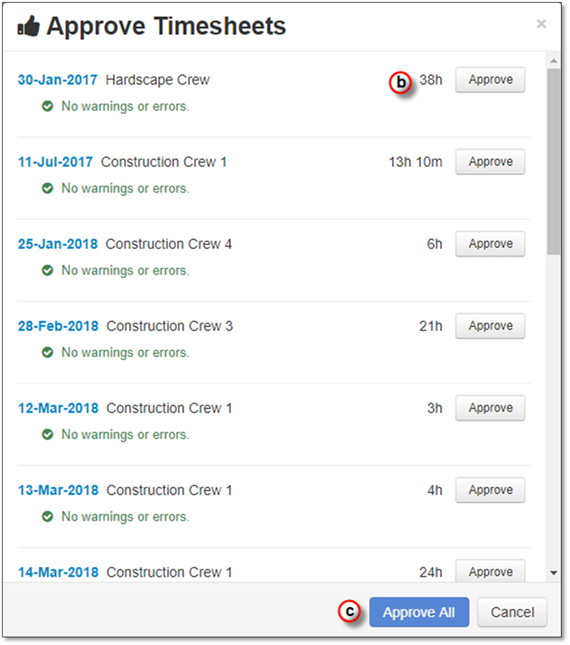
a. Select the Approve Timesheets button in the top right. A window will appear displaying all Timesheets ready for approval.
b. To approve them individually select Approve next to a Timesheet.
c. Click Approve All to automatically approve everything that is Ready For Approval.

