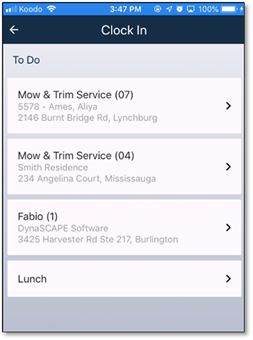
Click on the Clock In button from the main list. A list of available items currently on the timesheet will be presented.
Figure 6 - Selecting an item for clock in
Select the desired item by clicking on it. Once that is done, a list of employees to clock in will be presented in the top half of the screen. All of the employees will be selected by default. Any can be unselected by selecting the red minus button on the right. Additional employees can be added by using the ‘Add Employee’ button.
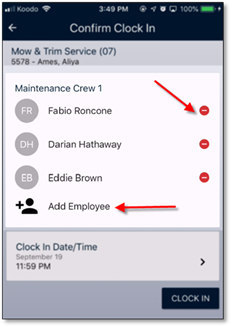
Figure 7 - Employee clock in selection
The bottom half of the screen will allow the clock-in time to be edited it necessary. The clock in date/time will be defaulted to the current time. This time can be edited by clicking on the card. Clicking on ‘Clock In’ will complete the clock in process. Completing the process will also set a GPS and time stamp (if available).
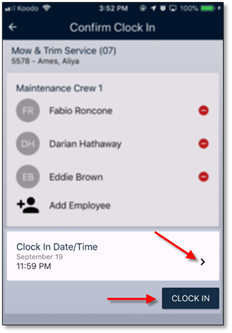
Figure 8 - Confirming the Clock in