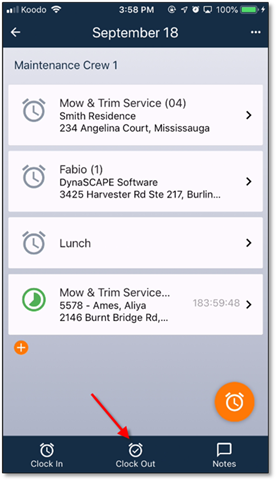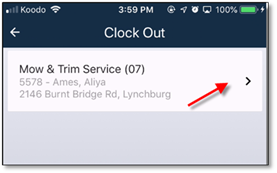
The clock out process is done in much the same way as the clock in and can be done either from the main timesheet page or from an individual item. Click on the clock out button in the bottom bar from the main page. If there are no employees that are currently clocked in, a message indicating this will appear, otherwise, a list of clocked in items will be available. Select the item to clock out of.

Figure 10 - Clocking out from the main page

Figure 11 - Selecting the item for clock out
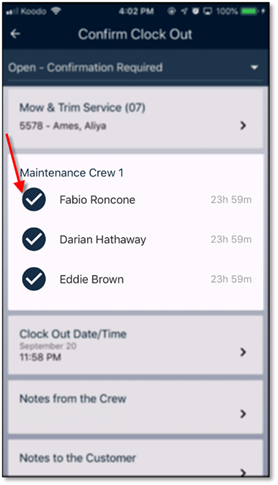
Selecting the item will then result in choosing which employees to clock out. All of the currently clocked in employees will be pre-selected, but this can be adjusted if necessary.

Figure 12 - Employee clock out selection
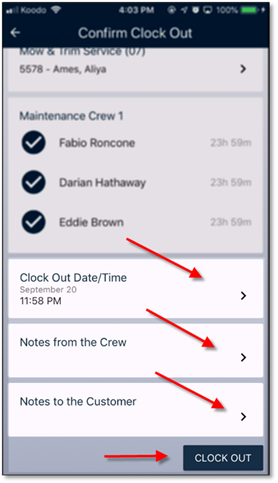
Below the employees list, there will be the clock-out time, and sections for both ‘Notes from the Crew’ and ‘Notes to the Customer’ all of which can be edited. The clock out date/time will be defaulted to the current time. Clicking on ‘Clock Out’ in the bottom right will complete the clock out process. Completing the process will also set a GPS and time stamp (if available).

Figure 13 - Clock out final confirmation