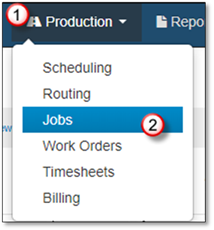
Select the Production menu Select Jobs option and pick a Job. Select the Contracts tab. The drop down selection shows the most Current Contract that has been approved for this Job. If you have created a change order, then you will also be able to choose the Original Contract and any Change orders that were created for this Job.
There are three basic types of Change Orders that can be created on an existing Job: Adding new items, Deleting existing items and Changing the Quantity of existing items. The Substitution option is simply an Addition and Deletion combined - it will remove the items being substituted out and then add the newly chosen items.
1. Go to the Production area.
2. Click on Jobs.

3. Find and select the Job that requires the Change Order.

4. From the Contracts tab of the Job, click on the New Change Order button.
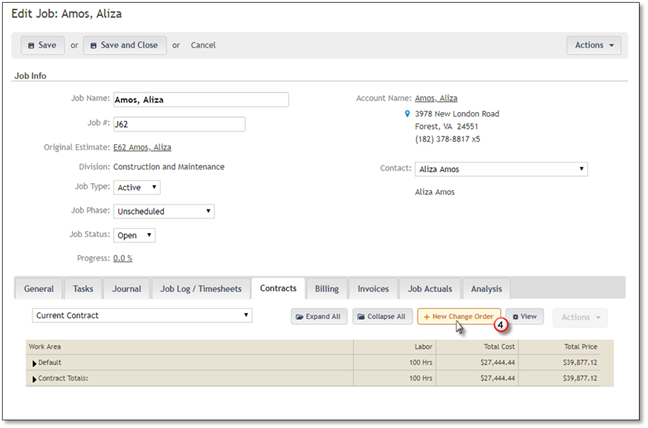
The new Change Order screen will be displayed.
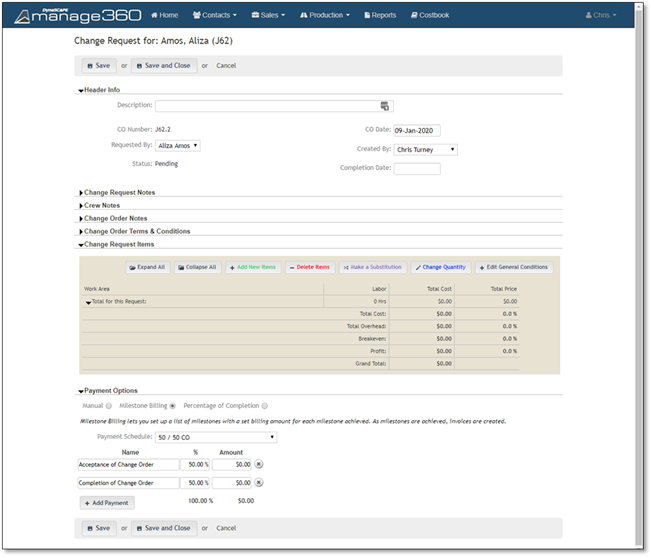
5. Entering Header Info.
This section will display basic information about the Change Order. Enter a Description for the Change order. This will help to identify each Change Order, if there are more than one on any Job. This will be displayed in Contract Tab drop down list and will also be used on Change Order reports.
The Change Order Number will be automatically created. It will be the existing Job number with a .1 appended - the number after the decimal place will be incremented for each additional Change Order that is created.
The Requested By field will have the Customer's name displayed. If there are more than one contact, then those names will be displayed as well.
The Change Order Date defaults to today's date and the Created By can be set to the user who will be doing the Change Order. It will default to the user currently logged in to the Manage360 site.
The Status of the Change Order will initially be set to Pending, but that will change once the Change Order is approved.
The Completion Date of the Change Order can be entered once the work for the Changed Order has been fully completed.

6. Change Request Notes section.
This is where any notes or details about the requested change can be entered. These notes are not displayed on the Proposal. They are internal notes to Manage360 and are not visible on any reports.

7. Adding Crew Notes.
This section is where any information that should be displayed on the Time Sheets related to the Change Order can be entered. They are internal notes to Manage360 and are not visible on any reports.

8. Adding Change Order Notes.
Any information that is entered into this section will be displayed on the Change Order proposal. This can be left blank if desired. They are included in the Work Order report for the Change Order.

9. Adding Change Order Terms & Conditions.
To display any Terms and Conditions for the Change Order, enter the desired text into this section. It can be cut and pasted from a different document if desired.

10. Change Request Items.
This section will display the Items that are going to be added or removed from the existing Contract via this Change Order. The Expand All and Collapse All buttons will either expand or collapse the sections that are displayed in the Items list.

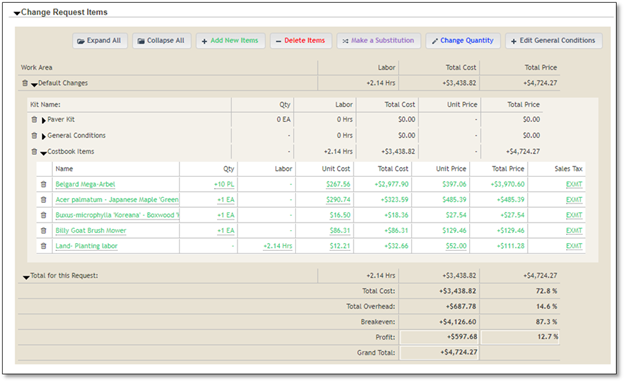
A. To Add additional items to the Change Order, click on the Add New Items button. This will open the Add Items to Change Order window. The process to add items is the same as Adding items to an Estimate. Click Add to Change Order when all of the new items have been selected. The additional items will be displayed, along with the Work Area that is being affected.
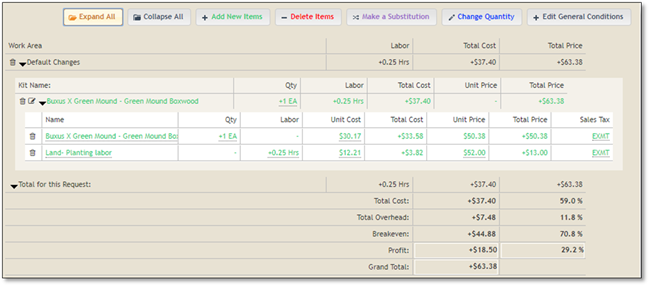
B. To change any of the quantities of items that are already existing on the contract, the Change Quantity option can be used. This can only be used pre-existing items. To remove and item entirely, the Delete Items should be used.
Clicking on the Change Quantity button will open a window that displays the current items and their costs. Click Expand All to see all of the details.
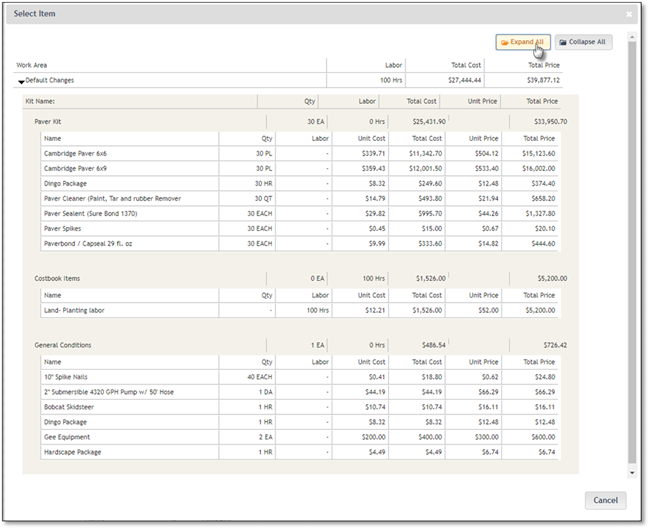
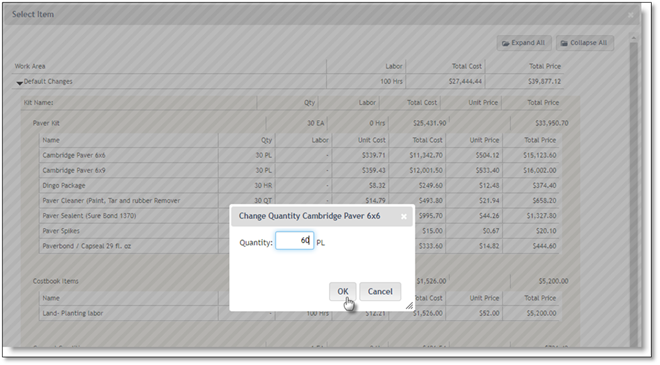
Click on the Quantity amount of the item that is to be changed. To change the quantity of an entire Kit, click on the quantity amount of the Kit. To change the quantity of an individual item (either in a Kit, or on its own), click on the quantity amount of that item. A window will pop up that displays the name of the item (or Kit) and the current amount. Enter the new amount and click OK. Click Cancel to close the window without making any changes.
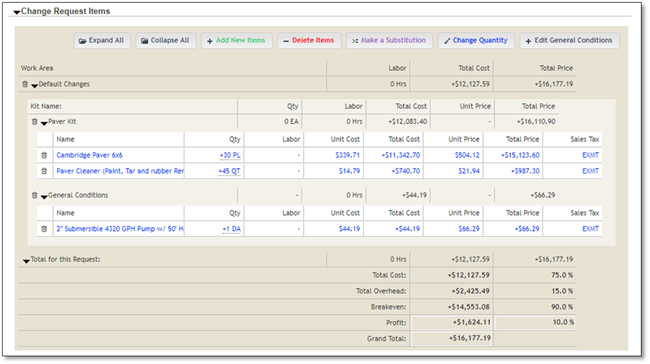
The Change Request Items section will display the quantities that have been changed in blue text. If the quantities have increased, it will be indicated with a + sign, while decreases will be indicated with a - sign.
To remove any of the items that are currently on the Contract, the Delete Items functionality can be used. This is to be used when all of the items of a particular type are to be removed. If only some of the items are to be removed, and some will remain, then the Change Quantities function should be used, as the Delete Items will remove the item (or Kit) in its entirety.
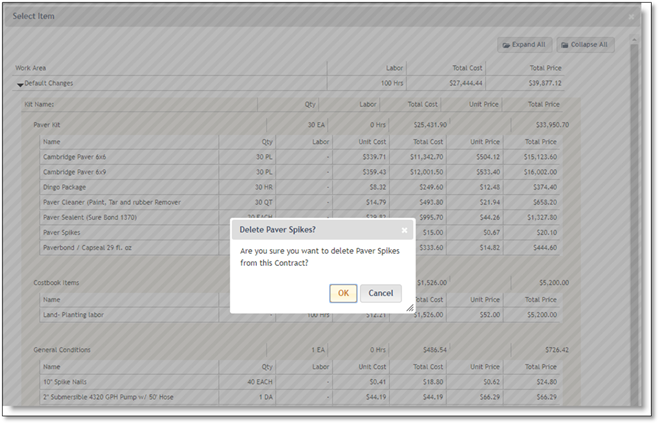
C. Clicking on the Delete Items button will open a window that displays the current items and their costs. Click Expand All to see all of the details.
Click on the item name of the item to be fully removed. A window will open asking for confirmation of the item removal. Click OK to remove the item or Cancel to close without any removal.
The Change Request Items section will display the quantities that have been changed in red text, and the removals will be indicated with a minus sign (-).
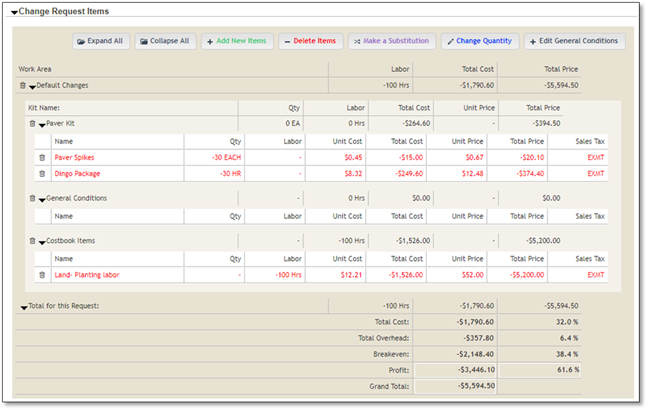
D. If an existing Item on the Contract is to be replaced with another Item in its entirety, then the Make Substitution button can be used. This will simply Delete the chosen Item and then Add the newly selected Item.
The Change Request Items section will display the quantities that have been changed in purple text. The Items that have been removed will be indicated with minus (-) sign and those that have been added will be indicated with a plus (+) sign. The overall amount and quantity changes will be displayed as well.
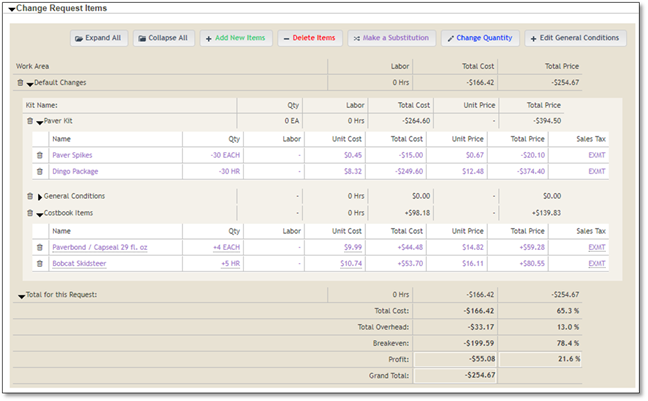
E. If the General Conditions for the Change Order need to be changed, the Edit General Conditions button should be used. The General Conditions can be modified in the same way that they are changed on an Estimate. The General Conditions will be displayed in their own section in the Change Request Items area.
11. Setting up the Payment Options
The Payment Options for the Change Order can be configured in this section. Either Manual, Milestone Billing or Percentage of Completion can be chosen. If Milestone Billing is selected, then the Payment Schedule must be chosen from the drop down list. All of the milestones specified for the schedule will be displayed along with the Amounts.

12. Saving the Change Order.
When all of the required information has been entered into the Change Order, click on either the Save or Save and Close buttons. If the Save and Close button is used, Manage360 will return to the Contracts tab of the Job that was initially selected and the Change Order will be in Pending status.