Creating a Maintenance estimate can be done several ways and they are outlined below. When creating a Maintenance estimate you add services
OPTION 1: You can create an Estimate from the Account.
OPTION 2: You can create an Estimate from the Opportunity, when creating a new opportunity, you can Save and Create a Maintenance Estimate OR while editing an opportunity you can click Add a Maintenance Estimate from the Maintenance Estimates Tab.
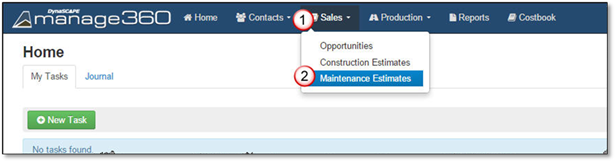
OPTION 3: You can create an Estimate from the Sales Menu as shown below:
1. Click on the Sales Menu.
2. Click on Maintenance Estimates option.
3. Select New Estimate.
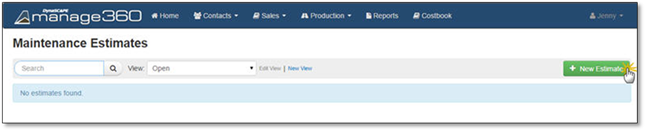
4. Select the Opportunity that the estimate will be based on, if you do not see the opportunity check your View or you can create a new opportunity then Save and Create a Maintenance Estimate. For information on how to do this see the Creating an Opportunity Section.

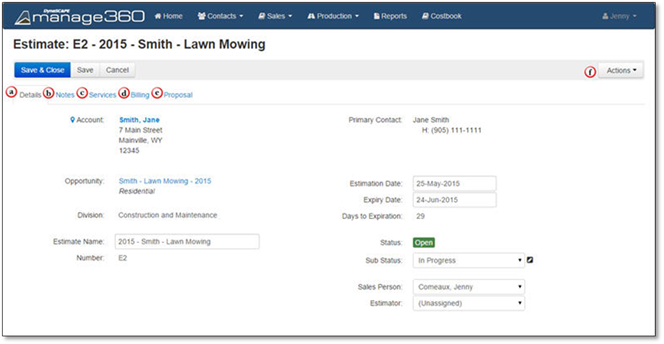
5. The New Maintenance Estimate will appear, here you can see the Details and Notes Tab. In the Details Tab, the following are the few non-editable areas and editable areas :
Account Name & Information - Clicking the Account Name will open the linked Account.
Opportunity - Clicking on the Opportunity Name will open the linked Opportunity.
Opportunity Type - The Opportunity Type is non-editable but can be edited from the Opportunity area.
Division - The Division is non-editable but can be edited from the Opportunity area.
Estimate Name - You can change the Estimate name by typing into the Estimate Name area, this will default to the Opportunity Name.
Primary Contact - The Primary Contact comes from the Account.
Estimation Date - The Estimation Date will default to the date that it was created, but you do have the option to edit this date, this date will be displayed on the Proposal.
Expiry Date - The Expiry Date is the date on which this estimate expires.
Days to Expiration - The Days to Expiration is generated by the system, provided that you have configured the Default Days for Estimate to Expire in the Division Settings. Otherwise, these days will be calculated based on the Expiration Date minus Estimate Date.
Status: This is set to Open by default, once you save this you can change this to Closed or Cancelled.
Sub Status: This is set to Confirmation Required by default & Confirmed is the other option. Sub Statuses are dependent on the Status option, here are the Status and Sub Statuses that go with:
Open Sub Statuses will be In Progress, Draft Review, Submitted to Client.
Sales Person - The Sales Person will be set based on the Salesperson in the Opportunity, but you can change the person who is preparing and delivering this estimate.
Estimator - The Estimator will be set based on the Estimator in the Opportunity, but you can change this based on the person who is preparing or creating the estimate.

6. Notes Tab - In the Notes tab, you can enter and edit notes into the text boxes by typing in directly or by copying and pasting from a text editor. These notes are not mandatory but if any changes are made you must click Save in order to keep the notes that you enter. The Notes tab has the following areas:
Proposal Notes - These are notes that will appear when you View and Print the Proposal for this estimate only. This text box has an editor that allows you to format the text that you enter.
Opportunity notes - These notes come from the Private Notes that may have been entered when the Opportunity was created, you cannot edit or remove these notes.
Crew Instructions - You may enter notes for your crew here, the notes that you enter will show up on the printed Work Order Report, if chosen.

7. Now you have 3 options after you are done entering your details.
•If you need to add more notes and add Items to the Estimate, or need to leave the computer for a few minutes click Save, continue to step 8
•If you are done with entering your Estimate details, click Save and Close
•If you want to discard the additions, click Cancel.
8. After you click Save you will be able to view the Estimate Details, Add/Edit Notes, Add Services, Billing and Proposal.
a. Details Tab - In the Details Area, the following are the few non-editable areas and editable areas :
Account Name & Information - This will open the linked Account.
Opportunity - This will open the linked Opportunity.
Opportunity Type - The Opportunity Type is non-editable but can be edited from the Opportunity area.
Division - The Division is non-editable but can be edited from the Opportunity area.
Estimate name - You can change the Estimate name by typing into the Estimate Name area, this will default to the Opportunity Name. Our current recommended naming convention is Year - Account Name - Service e.g. 2015 - Smith - Lawn Mowing
Estimate Number - The Estimate Number is generated by the system, provided that you have configured the Estimate Number in the Division Settings.
Primary Contact - The Primary Contact comes from the Account
Estimation Date - The Estimation Date will default to the date that is was created, but you do have the option to edit this date, this date will be displayed on the Proposal.
Expiry Date - The Expiry Date is the date this estimate needs to be delivered by.
Days to Expiration - The Days to Expiration is generated by the system, provided that you have configured the Default Days for Estimate to Expire in the Division Settings. Otherwise, these days will be calculated based on the Expiration Date minus Estimate Date.
Status: This is set to Open by default, once you save this you can change this to Closed or Cancelled
Sub Status: This is set to Confirmation Required by default & Confirmed is the other option. Sub Statuses are dependent on the Status option, here are the Status and Sub Statuses that go with:
•Open Sub Statuses will be In Progress, Draft Review, Submitted to Client
•Closed Sub Statuses will be Won & Lost
•Cancelled Sub Status will be Old Version & Expired.
 Note:
Note:
Manage360 will have 3 Statuses and 7 system Sub Statuses.
Sales Person - The Sales Person will be set based on the Salesperson in the Opportunity, but you can change the person who is preparing and delivering this estimate.
Estimator - The Estimator will be set based on the Estimator in the Opportunity, but you can change this based on the person who is preparing or creating the estimate.
b. Notes - In the Notes tab, you can enter and edit notes into the text boxes by typing in directly or by copying and pasting from a text editor. These notes are not mandatory. The Notes tab has the following editable areas:
•Proposal Notes - These are notes that will appear when you View and Print the Proposal for this estimate only. This text box has an editor that allows you to format the text that you enter
•Opportunity notes - These notes come from the Private Notes that may have been entered when the Opportunity was created, you cannot edit or remove these notes
•Crew Instructions - You may enter notes for your crew here, the notes that you enter will show up on the printed on the Work Order Report.
Click on the "Click to add text..." message, add your notes and click Done if you'd like to retain the notes or Cancel to discard your additions.

c. Services Tab - Once you have added Services you will be able to Expand all and Collapse All the items. You can +Add Services to the estimate and once your services are added, they will be under Included, Optional, As Needed or On Demand depending on the setup of the Services. You will also be able to view the Analysis. The features in the Services tab is shown below.

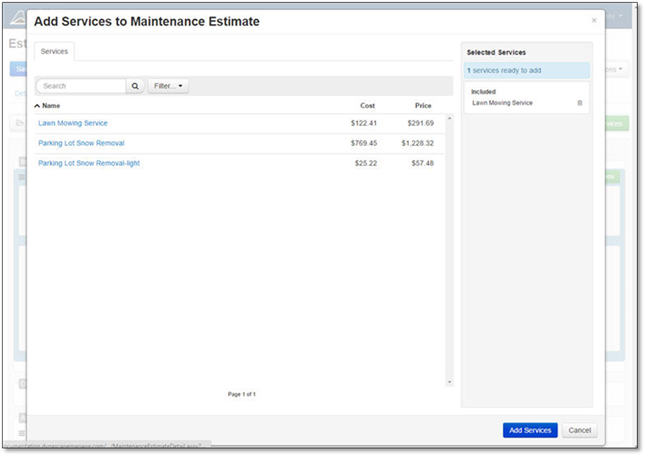
Click +Add Service then click on the Service that you would like to add, the Add Service to Maintenance Estimate pop up will appear with the Details and Notes for the Service.

In the Details Tab, the following are non-editable: Name, Division, Service Category, but you can change the Display Name which is the name customers will see on the quotes, invoices, etc. You can choose if this is an Optional Service, change the Charge Type to Per Visit or Time and Material, further details can be found in the Services - Charge Type area. You can also choose the Include options of As Needed, On Demand, In Contract as well the Recurring options, further details can be found in the Services - Charge Type Area.
In the Notes tab, you can see and edit the Crew Instructions and the Customer Description.
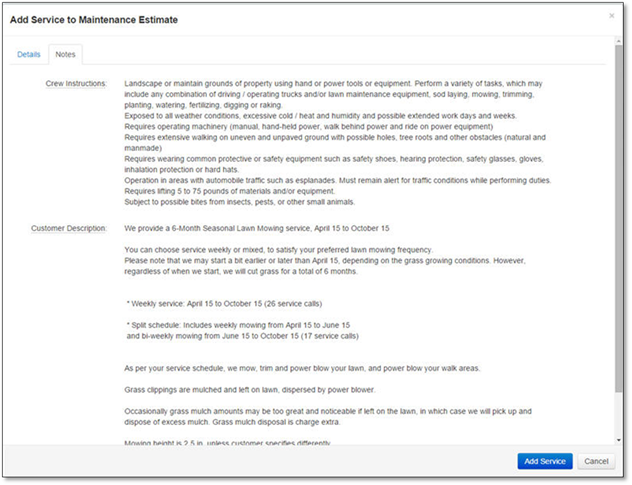
Click Add Service to add this Service to the "Shopping Cart" OR Cancel to discard the addition.
Add more Services, if necessary or click the Add Services button, if you are done or Cancel to discard this addition.
You will now be brought back to the Maintenance Estimate screen. If you need to change the General Conditions for the Service click Add or Edit General Conditions, you can also add additional items into the Service by expanding the service then clicking the +Add Items button - further details can be found under Add Items to Service in Maintenance Estimate or in the Services Area under the Add Items to a Service section. To Move Items, please see the Moving Items in a Maintenance Estimate.
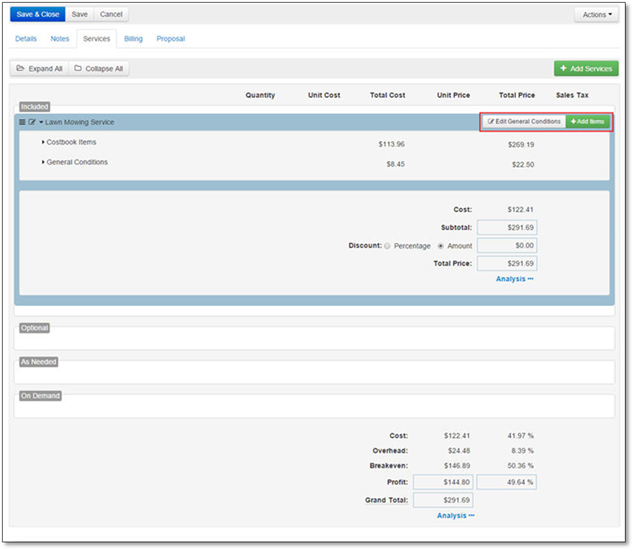
After you have added all your Services and Items, you can view the Analysis in the Service Area or Estimate area.
Clicking on Analysis under the Service will allow you to view the Cost/Visit, Overhead, Breakeven, Subtotal/Visit, Profit, Total Price/Visit, Labor/Visit & Hourly Revenue.
Click on Analysis at the bottom of the Estimate will allow to view the Cost, Overhead, Breakeven, Profit, Grand Total, Labor & Hourly Revenue.
d. Billing Tab - Once you have added Services to a Maintenance Estimate you can provide a discount for prepayment, and you can set how the billing will be set up. The Discount For Prepayment can be a Percentage Or an Amount. The Type of Billing can be set in one of three ways:
•Manual Billing - All Jobs that have the billing set to Manual will only be invoiced when you create an invoice manually
•Per Visit Billing - All Jobs that have the billing set to Per Visit will only be invoiced when you create an invoice manually
•Periodic Billing - Periodic billing lets you set up monthly/weekly billing, if you choose this, then you will need to set the First Payment Date and Number of Payments, then you can click Prefill to automatically calculate the Payment Amounts. If you click +Add Payment, then the Number of Payments will match however many Payments you add.
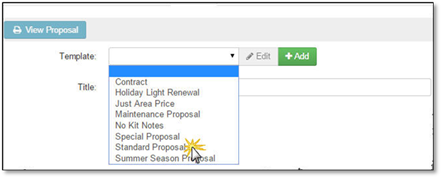
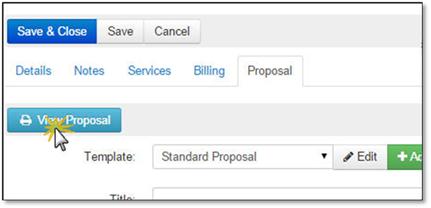
e. Proposal Tab - Once the Maintenance estimate is complete; you can View the Proposal then print it for your customer. To do this, either click View Proposal or Select a different proposal Template from the drop down then click View Proposal.
 Note:
Note:
Proposal Templates created in Maintenance and Construction Modules (if applicable) are shared.
To create a New Proposal Template, please see the Add a Maintenance Proposal Template section or to Edit the Template, Header or Footers, please see the Edit Maintenance Proposal Template section.
f. Actions Menu
I. Reports - After you are done with the estimate, you can view, export or print the following Reports: Maintenance Estimate Analysis - Report to print out the detail of the estimate & Work Order - Maintenance Estimate.
II. Refresh Pricing - If you made any changes to the estimate items you can refresh the pricing, the following fields will be refreshed from the original Service and Costbook items and the Division of this Estimate:
•Unit Cost
•Equipment rental status
•Supplier of Equipment and Subcontractors
•Purchasing Tax
•Overhead Recovery Markup rate
•Warranty rate
•Labor Burden rate
•Unit Pricing of Subcontractors and Misc. Items
•Fixed Pricing
•Profit Margin and Profit $/Hour
•Sales Tax Rates.
If an item has been deleted from the Service and Costbook, Overhead and Profit settings will be set to the Division defaults.
III. Estimate Won - When estimates are won, the opportunity needs to be closed. Please specify the reason this was won, the date, and any relevant comments. These details will be saved into the opportunity record.
IV. Estimate Lost- When estimates are lost, the opportunity needs to be closed. Please specify the reason this was lost, the date, and any relevant comments. These details will be saved into the opportunity record.
V. Delete Estimate - If an estimate is no longer needed, you can easily delete it through the Actions Menu.
For further details please see the Maintenance Estimate Actions Menu area.