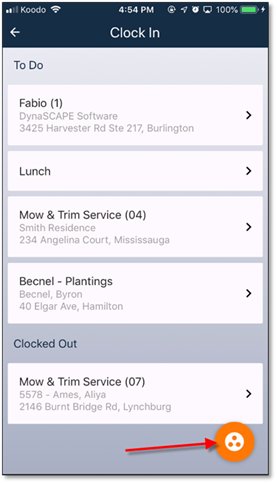
In order to start the group clock in process, the clock in button from the main timesheet list page must be used. If the clock in button from the visit is used, the app will assume that the clock in is happening only to that specific item.
When the item list is presented, if there are available visits that can be grouped, then an orange Group button will appear in the bottom right of the screen.
Figure 38 - Grouping Visits
Clicking on the group button will display the visits that can be included in the group (any construction jobs or T&M work orders will be automatically omitted). There will be checkboxes beside each one so that only the desired visits can be included. If only one visit is selected, then the app will continue with the standard clock in process and not create a group.
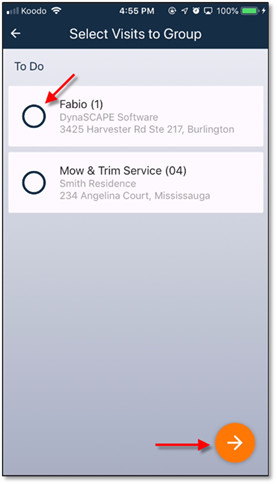
Figure 39 - Selecting Visits to Group
Once the visits have been selected, click the continue button to confirm the employees. From this point, the clock in process is the same as the standard. Upon completion of the clock in process, the items will no longer be listed individually on the app, but listed as ‘Grouped Visits’
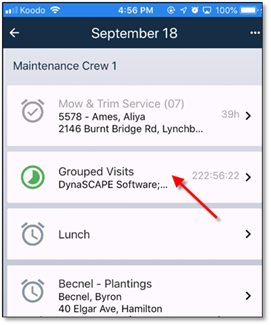
Figure 40 - Grouped Visits on the Timesheet