
The initial creation of a kit is a simple task that takes less than one minute. To create a kit, follow these steps:
1. Go to the Costbook.
2. Click on the Kits link.
3. Click the + New Kit button to open the input screen.

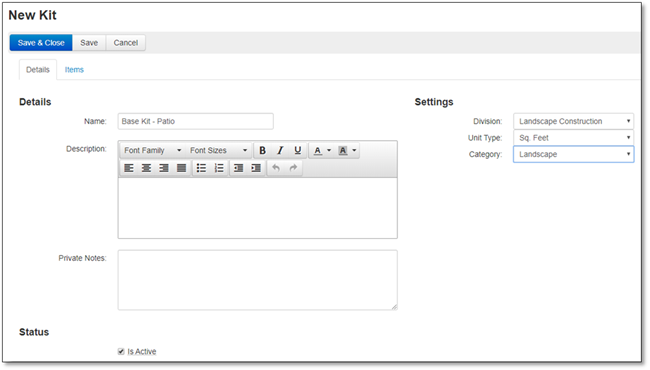
4. The New Kit Details tab is displayed, and the following information can be entered:
Details section:
Name - The name is used to identify the kit when adding it to an estimate. Use a descriptive name that can be remembered.
Description - The description can be shown on proposals when the kit is added to an estimate.
Settings Section:
Choosing the Division will set the Sales Tax, but you can choose to change this tax.
You can choose a Cost Code which is used for tracking job costs on your Timesheet/Job Log, if you have the Job Management Module.
You can choose the Unit Type from the drop down list, this will be the same unit of measure that is used to do the material takeoff.
Status Section:
You can choose to set this as Is Active(Inactive), it is set to Active by Default you will uncheck this in the future when you no longer want to use this kit but not delete.
Default Billing Section:
The way the way that the item will be billed to the customer. Future modules will have different billing options.
The Kit Items tab is where you will be able to add items to this kit, to do this click the Add Items button.
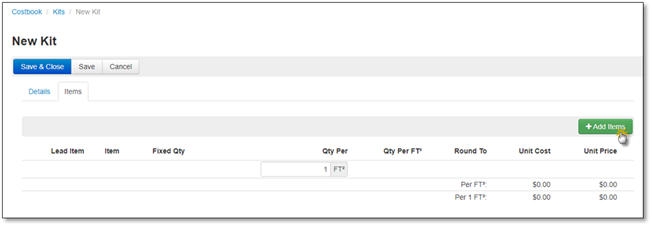
Qty Per (Kit Sample Qty) is specified here. This is a known quantity for which you know the production rates and quantities of materials and equipment. For example, if you know how long it takes for your crew to install 500 feet of patio you can enter 500 in this field and when this quantity is changed manage will recalculate for all the unit the cost items.

a) Click +Add Items
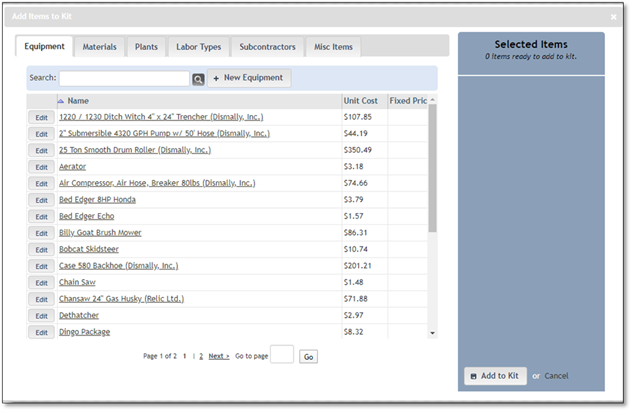
Select the item type from the list of tabs across the top of the screen (Equipment, Materials, Plants, Labor Types, Subcontractors, Misc. Items).
The system will then load the entire list of these items from the Costbook. These can be further filtered by Favorites, Division, Category and/or Supplier for certain items.
Click the name of the item you wish to add to the Kit.
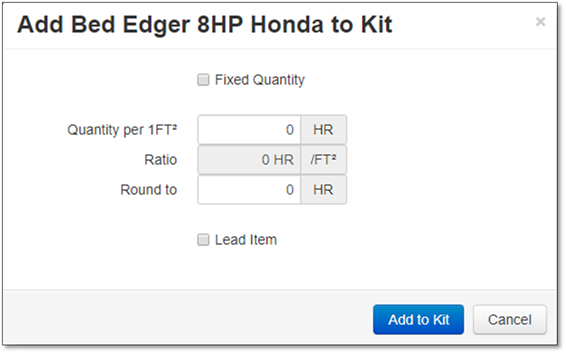
b) After you have clicked on an Item to add to the kit, if you use fixed quantities, then choose "Is Fixed Quantity?", otherwise enter the quantity of this item that will be required for the Quantity of your kit.
You can also have the item rounded by entering a quantity in the Round to field. This will round the calculated quantity up to the nearest increment specified.
In the case of a planting or paving kit you can make the item a lead item. If a kit has multiple lead items, only one will be brought into the estimate at a time based on your selection.
Click OK to add the item to the kit.
Continue adding items by repeating the above steps.
These items will be added to the section Selected Items on the right hand side of the Add Items to Kit.
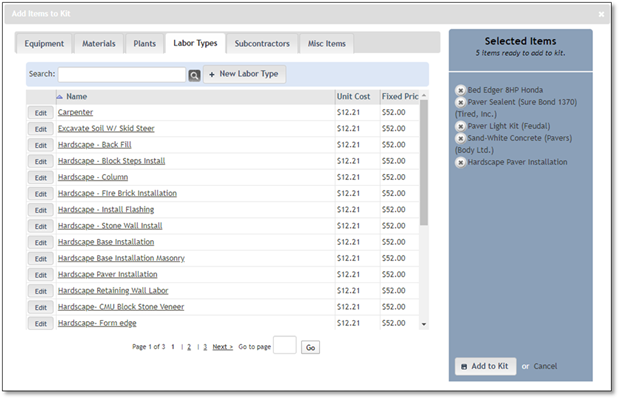
Click Add to Kit to add all the selected items to the Kit or Cancel to disregard the additions, you will be brought back to the "New Kit".
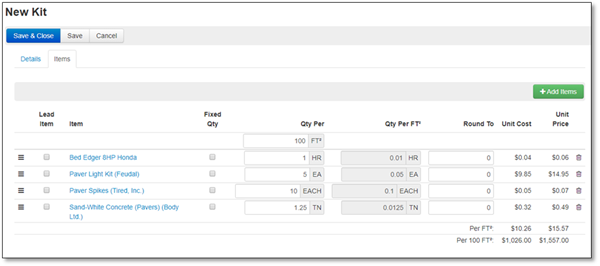
5. Click Save to complete this process or Cancel to discard the addition.