 Note:
Note:
You can use the following steps to create a new Account in Manage360.
 Note:
Note:
To ensure you do not create a duplicate Account, please use the search to ensure the account doesn't already exist.
You can create an Account which could be used for tracking leads, customers and accounts by following these instructions:
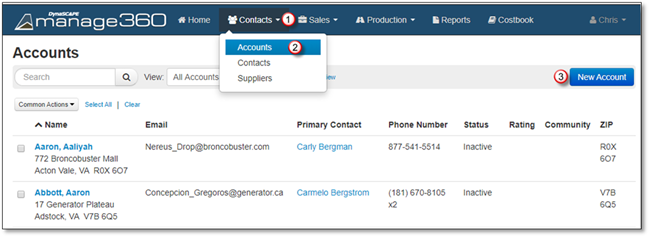
1. Click on the Contacts Menu.
2. Click on the Accounts.
3. Click on the New Account button.
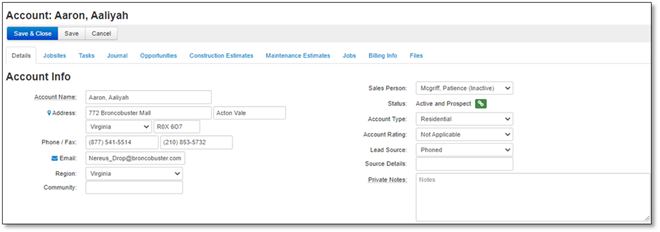
4. Entering Account Info.
In the Account Info area, it is mandatory to enter the Account Name, and a Phone Number. The Phone number and Account Name will pre-fill the contact if you format the name with LASTNAME, FIRSTNAME.
If a phone number is not known you may select a generic number such as 000-000-0000.
The Sales Person will default to "Please select an item..." if you are not a Sales Person, it will default to your name if you have the Salesperson role in your Employee Settings.
The Account Type will default either Residential or Commercial, based on the settings in the System Configuration.
All other fields are optional.
 Note:
Note:
Clicking this icon beside Address will search for the address in Google
Maps in another window. Clicking this icon beside Email
  will open your email program to send an
email.
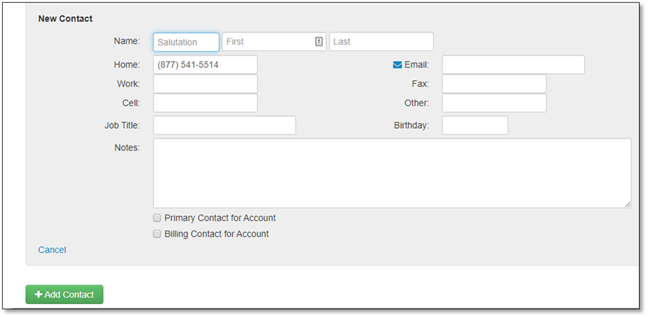
5. Entering Contacts for an Account - required to continue.
Enter the First or Last Name as either one need to be entered before saving, if you entered the LASTNAME, FIRSTNAME in the account then it will be pre-filled.
The optional fields are the Salutation, Home, Work, Cell, Job Title, Notes, Email, Fax, Other, Birthday or Contact Notes, feel free to enter as much detail as you wish.
If this is the only contact, then this contact will be the Default Contact and Billing Contact for the Account.
If you want to discard the addition, click Cancel.
If you are done and would like to create another contact, click Add Contact.
6. After inputting your Account and Contact information, you have 3 options as outlined below:
•If you are done creating a new contact and want to go back to the Accounts list, click Save and Close
•If you need to leave the computer for a few minutes or are ready to continue with Entering Tasks, Journals, Opportunities or Estimates, click Save

•If you want to discard the addition, click Cancel .
7. Entering Jobsites.
The Jobsite tab will show you how to assign multiple properties to a single account, click New Jobsite to create a new one for the account
For detailed information please see the Creating a Jobsite section in the Jobsite area.
8. Entering Tasks.
The Task tab will show you the Tasks associated with the account, click New Task to create a new one for the account
For detailed information please see the Adding a Task section in the Home area.
9. Entering Journal Entries.
The Journal tab will show all the activities that have occurred with the account, you will see activities such as when the account was created, click New Entry to create a new one for the account.
For detailed information please see the Adding a Journal Entry section in the Home area.
10. Entering an Opportunity.
The Opportunity tab will show you the associated Opportunities with the account, click New Opportunity to create a new one for the account
For detailed information please see the Creating an Opportunity section in the Opportunity area.
11. Create, Edit or View Estimates.
A. Create Estimate.
Click on Construction Estimates Tab then +Add Construction Estimate.

OR
Click on Maintenance Estimates Tab then +Add Maintenance Estimate.

 Note:
Note:
If you do not have the Maintenance Estimates tab, please contact sales to purchase the Maintenance Module.
Choose an existing opportunity or create a new opportunity.
Select a Estimate Template then continue with adding items to the estimate.
Please see the Construction Estimates Area for more details.
Please see the Maintenance Estimates Area for more details.
B. Edit or View Estimate.
Click on the Construction or Maintenance Estimates Tab then click on the estimate name to edit or view it.

12. Viewing Jobs.
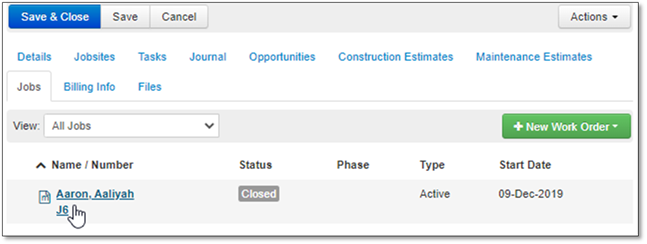
Go to the Jobs Tab.
Click on the Job name to view the Job Detailed Information.
For more information regarding jobs, please see the Job Detail Information area.
13. Viewing or Changing Billing Info.
The Billing Info tab will show the Billing Information as well as the Taxation and Payment Terms for this account.
 Note:
Note:
Be sure to choose the Sales Tax for your Account as this is what is used for the Estimates.
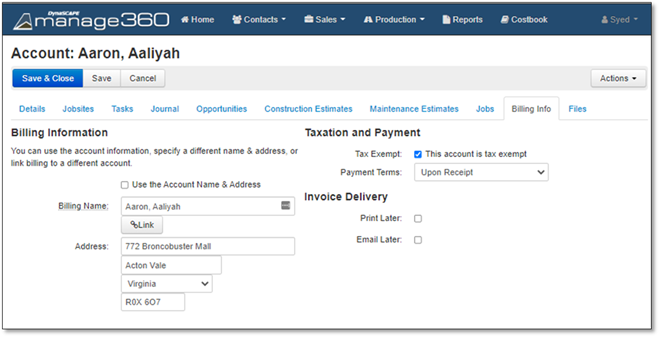
By default, the Billing information is set to “Use the Account Name & Address”, to change the Billing Name or to link to a different Account, uncheck "Use the Account Name & Address".
The name and address will default to the current account name and address, but you can change this at this point OR you can click the Link button to link to another account.
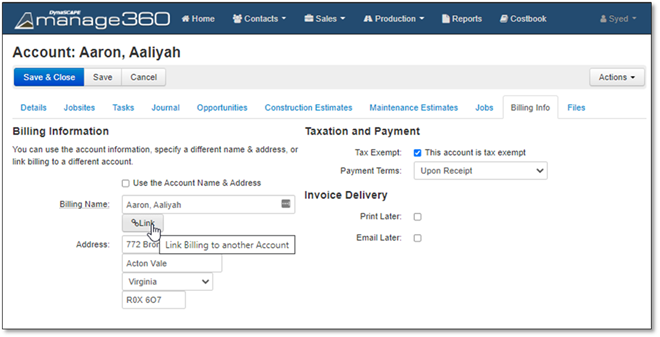
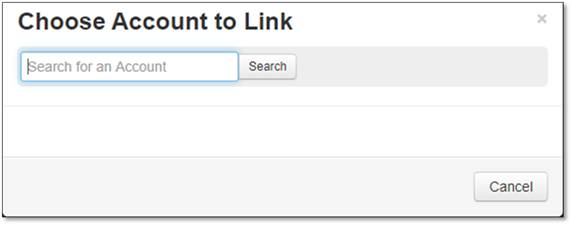
After clicking the Link button, a pop-up to search for an account will appear so that you can link that account.
When an account is linked, the Billing Account Name will be a link to open that account, and you will see an Unlink button.

When you view the Billing Account if
it has other accounts linked to it than a Linked Accounts
section appears in the Billing info tab.
When an account is the Billing Account, you can choose to uncheck "Use the Account Name & Address" to change the Billing Name or Address, but you do not have the option to link to another account, because this is Account has Linked Accounts.

Each Account will have a status attached to their record once saved depending on what occurs with the Account:
Status: Prospect - Account with an open Opportunity.
Status: Active - Customer is an account with an approved estimate.
Status: Lead Only - No open Opportunities (or previously completed jobs).
Status: Inactive - At least one closed Job.