There are several ways to edit an estimate and they are outlined below:
OPTION 1: You can edit an Estimate from the Account, Go to Construction Estimates tab and Select an Estimate
OPTION 2: You can edit an Estimate from the Opportunity, Go to Construction Estimates tab and Select an Estimate
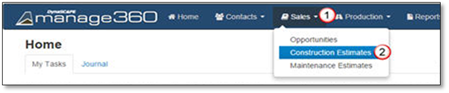
OPTION 3: You can create an Estimate from the Sales Menu as shown below:
1. Click on the Sales Menu.
2. Click on Construction Estimates option.
3. Select an Estimate.

4. Make all Required Updates to the Estimate.

General Info Tab - In the General Info area, the following are the few non-editable areas and editable areas :
Account Name - This will open the linked Account.
Estimate name - You can change the Estimate name by typing into the Estimate Name area, this will default to the Opportunity Name.
Estimate Number - The Estimate Number is generated by the system, provided that you have configured the Estimate Number in the Division Settings.
Opportunity - This will open the linked Opportunity.
Opportunity Type - The Opportunity Type is non-editable but can be edited from the Opportunity area.
Division - The Division is non-editable but can be edited from the Opportunity area.
Status - This is the Status of the linked Opportunity (not of the Estimates)
Estimate is Active - The Estimate is Active will automatically be set to active and will be checked as long as the estimate has not been won. The estimate will become inactive automatically when this estimate becomes a job or if a new version is created.
Estimate Date - The Estimate Date will default to the date that it was created, but you do have the option to edit this date, this date will be displayed on the Proposal.
Days to Expiration - The Days to Expiration is generated by the system, provided that you have configured the Default Days for Estimate to Expire in the Division Settings. Otherwise, these days will be calculated based on the Expiration Date minus Estimate Date.
Expiry Date - The Expiry Date is the date this estimate needs to be delivered by.
Sales Person - The Sales Person will be set based on the Salesperson in the Opportunity, but you can change the person who is preparing and delivering this estimate.
Designer - The Designer will be set based on the Designer in the Opportunity, but you can change this if the Designing will be assigned to someone else.
Estimator - The Estimator will be set based on the Estimator in the Opportunity, but you can change this based on the person who is preparing or creating the estimate.

An estimate can be edited, and the General Info Tab has the following editable fields:
•Estimate Name, which you can edit the estimate name to reflect the specifics for this estimate.
•Estimate Number, which you can manually enter this, but it can also be generated automatically. The automatic settings details should be set up in the settings Division section.
•Estimate is Active toggle on/off by clicking the box, which is automatically be set to active when you create the estimate. If this Estimate will no longer be active and you want to still refer back to it, you can uncheck this. The estimate will become inactive automatically when this estimate becomes a job.
•Estimate Date which is defaulted to the date that it was created, but you can edit this date.
•Expiry Date is the date this estimate needs to be delivered by. The automatic settings should be set up in the settings Division section.
•Sales Person is the person preparing and delivering this estimate.
•Designer is the Designer that is assigned to this estimate.
•Estimator is the person who prepares or creates the estimate.
The General Info tab also has the following non editable fields:
•Opportunity link that is associated to the Estimate, clicking the link will take you back to the opportunity details screen where you can make any changes at the opportunity level.
•Opportunity Type which was selected at the time the Opportunity was created. These can be managed at the Settings tab - Opportunity Type -section.
•Division which was set when the Opportunity was created. Divisions can be managed at the Settings tab - Divisions section. Status: Open or Closed Status set at the Opportunity at the time of creation this is set to open by the system by default while the estimate has not expired and/or has not been won.
•Days to Expiration is a specified amount of time before an estimate expires. This will be initially set by the "Days to Expiration" setting in the Division in the Settings tab. Divisions section.
The Notes tab has the following editable areas:
•Opportunity notes - These are notes that come from the Opportunity
•Proposal Notes - These notes will appear on the Proposal
•Crew notes - These are notes that will appear on the Timesheet.
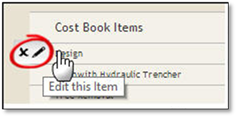
The Items tab is the area where you can change your view, expand and collapse the view of your items, where all the items on your estimate can be added, edited, removed. You can Add or Edit your General Conditions. Kits can be reorganized within the Work Area or Work Areas can be moved if you place your mouse over the name and click on the up/down arrow icon or for more detail please see the Move Kits or Work Areas. You can Edit or Delete items, place your mouse over the item name, a pop-up menu will appear, click on the X to remove the item or the Pencil icon to edit the Item:
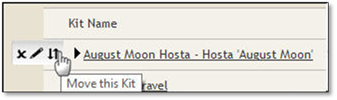
To move a kit, place your mouse over place your mouse over the item name, a pop-up menu will appear, click on the Up/Down Arrow Icon:
Payment Options:
You can select any one of the payment options for this estimate, for detailed information please see the Editing Payment Options section.
5. Save to keep the changes to the Estimate.