To select labels to put them in a work area or phase follow these steps:
1. In your Modes list, click on the All_Labels_On mode to make all our labels visible on the drawing.
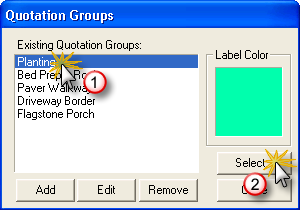
2. Select a work area or phase name from the list in the Quotation Groups Panel. The color for that label will appear in the panel.
3. Click on the Select button. The panel will disappear to allow you to see the drawing clearly.
4. Click on each label in the drawing that you wish to belong to that work area or group. Right-click when finished and the labels will change to the color for that grouping.
Note: Keyed labels do not
change in color but the label will still belong to that work area in the quote
that is generated from this drawing.
You can find more detailed information on Labeling with screen captures in the Design User Manual, Chapter 12.
If you do not have a current copy of the Design User Manual you can download it in PDF format by opening DS|Design, going to the ‘pull-down’ menus Help > Online User Manual, which will open the default web browser on the computer to the DynaSCAPE product manual webpage from which you can download the DS|Design manual.